
In this lesson, we will detail all the sections as well as the different fields of the call creation form.
Objectives of the lesson :
- Understand how to create a call and the fields that need to be filled in
HOW TO TAKE A NEW CALL?
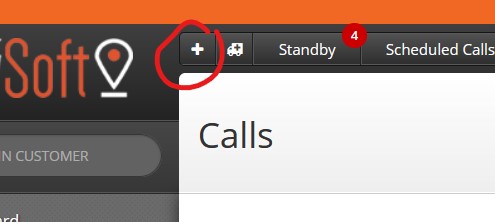
To take a new call in TowSoft, click on the + icon at the left of the call lifecyle bar.
The call creation form includes several fields and features. However, it is not mandatory to fill in all the fields to create a call. In case of an emergency call, you can create a call by specifying only the type of service (service code) and the origin (location of the intervention site). Note that you or your drivers can fill in the missing information at any time after a call is created.
We suggest that you familiarize yourself with the form. Note that the most efficient way to move to the next field is to use the TAB key, and use the SHIFT and TABULATION combination to go back to the previous field.
The call creation form is divided into 5 sections; they are explained in detail below.
CALL DETAILS SECTION
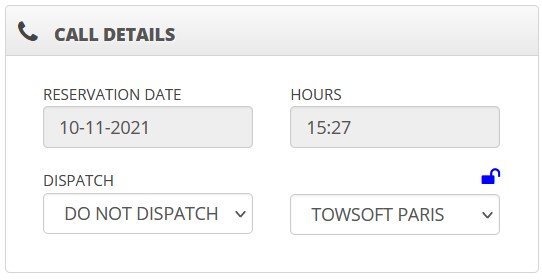
In this section you will find the following:
- Reservation date
- Dispatch options
- Company or site that will be executing it (if operation in multi-company set up)
In most cases, you will not have to change the fields in this section when creating a call.
If you change the date and time of the reservation, you will be able to create a scheduled call, that will then appear under the “Scheduled Call” tab.
The default dispatch option is DO NOT DISPATCH, your call will therefore be put on “Standby” when you have completed its creation.
The main site (or company) is selected by default, but will automatically change based on the location of the call origin.
CLIENT SECTION

In this section you will find the following:
- Client account
- Purchase order # (if police call and if provided)
- First name
- Last name
- Phone number
- Extension associated with the phone number
- More information
- Address Lookup (you must enter the address and select the correct one from the suggested choices; the following 4 fields will then get automatically filled in)
- Authorized by
- Phone
- Extension
- Send SMS for geolocation
- Send SMS to signal driver departure
The CLIENT ACCOUNT field should be filled if the call should be invoiced to a client that is already registered in your company’s list of clients. Leave it blank if the call will have to be paid on the spot (cash call). This field searches your base as soon as you type 3 characters.
If the call is billed to a client account, you should then fill in the P.O. (purchase order) # if you have it. In case of a cash call, again, leave it blank.
Then, fill in the FIRST & LAST name of the client on the site of intervention as well as his/her mobile PHONE number and EMAIL address. Entering the right mobile phone number will be key if you want to send SMS to the client for geolocation or information purposes. Entering the right email address will be key if you want to send damage reports or invoices over email, once the call is done.
Now, if applicable, fill in the AUTHORIZED BY field, that is to say the name of the person who authorized the job (or order) at your client. In case of a roadside assistance client, this can be the name of the agent. You can also complete with the telephone number to reach this “authorized person” in the event of a problem with the call.
The last step would be to check the “Send SMS to geolocate” and “Send SMS on driver departure” if you need to get/provide these additional details.
ORIGIN / DESTINATION SECTION
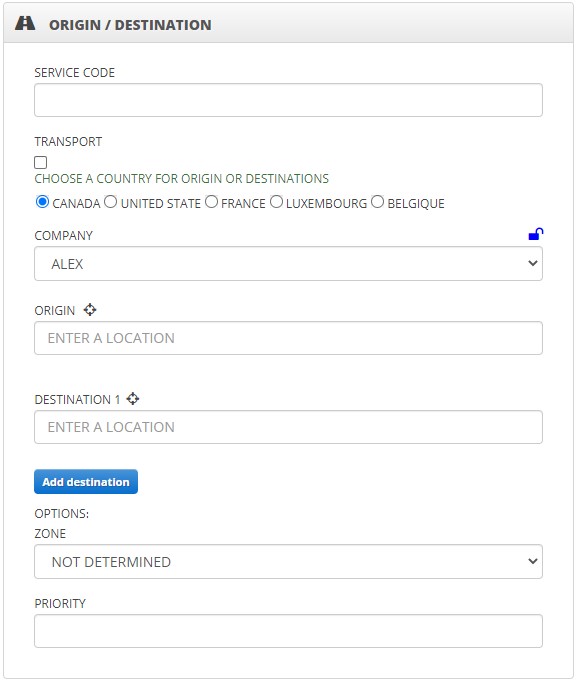
In this section you will find the following:
- Service Code
- Checkbox for transport call
- List of countries to be checked (in the event that more than one country is selected in the COUNTRY tab of OPTIONS FOR SUPER ADMIN)
- Company
- Origin
- Destination1
- Zone
- Priority
The SERVICE CODE field allows you to set the service to be provided on this call. The system will search among your configured services as soon as you type 2 characters in this field and suggest the closest matching ones in the drop-down list.
Once the service is selected, you will notice that the call’s estimated amount will appear on the right side of the screen.
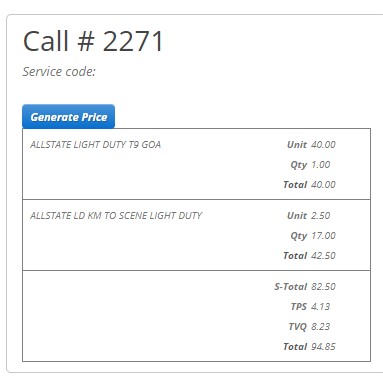
This pricing will also be influenced by the data entered in the following fields, namely the origin (location of intervention site) and the destination.
The ORIGIN and DESTINATION fields allow you to search for and select an address or a business name in order to geolocate it. The system starts searching as soon as you type 1 character in it. In the event that you cannot find the location, TowSoft still allows you to enter a full address to guide your driver. The geolocation coordinates will be taken when the driver signals his arrival on site. You can also use the mapping feature by clicking the target icon to the right of the field titles.

You will see a map appear that you can navigate and click on to select a location.
When both the ORIGIN and DESTINATION are detailed, you will notice that TowSoft automatically calculates and displays the following distances and times:
- Route from your workshop to the intervention site (origin)
- Route from intervention site to destination
- Route from the destination to your workshop
Note that this takes traffic into account.
Lastly, the ZONE field allows you to select, among your already configured zones, an area that that will be displayed in the different call tables in TowSoft (Orders, Standby, Ongoing) for you to better identify where the intervention site is. In the PRIORITY field, you should type in a character, and you will get suggestions from your list of already configured priorities (ie. Police, AllState) that will, again, allow you to better identify the level of importance of the call in your different call tables (see below).

VEHICLE OR LOAD SECTION
In this section you will find the following:
- Manufacturer / Load
- Model
- Year
- Color
- Plate #
- VIN #
- Weight
- Length
- Width
- Height
- Unit number
- Odometer
These fields are all optional when creating a call. However, the more accurately you complete them, the more efficient you will be when searching for records in the future.
The ADD VEHICLE button will allow you to enter an extra vehicle and as soon as you validate the creation of the call, it will create another call with the exact same calls details, but with this other vehicle instead of the first one.
ADDITIONAL INFO SECTION
In this section you will find the following:
- Notes
- Other billing notes (optional)
- Invoice number
- Police event # (if a police call and if provided)
The NOTES and OTHER INVOICING NOTES fields allow you to enter relevant information about the call in question. These are visible to office staff as well as drivers.
CALL CONFIRMATION
Once you have filled in the fields to the best of your knowledge in the 5 sections, with the 2 mandatory details (service code & call origin) at the very least, and have verified that all info shown in the right-hand side of the screen (call price estimate, calculated route distance) looks OK, you can click on validate call. This will take you to the “Standby” calls list for you to dispatch it (if not already done).
Note that nothing is set in stone, as you will be able to edit the detail of the call, at any stage of its execution. The driver to whom you’ve dispatched it will also be able to add or edit the details in it using the TS4 mobile app.
List of comments