

In this lesson, we show you how the client order portal, also known as the intranet, works.
Objectives of the lesson :
- Be able to create users for a client's order portal and send them their login information.
- Be able to configure different order taking form templates and activate them depending on the type of client
What is the client order portal used for?
The client order portal allows your clients to send work to you digitally, that is, from their computer or mobile device, and therefore collect all the necessary information upfront so that you can dispatch the call from your TowSoft, without having to ask for any other additional details. This is a feature that will generally be greatly appreciated by your clients.
How to provide access to the order portal to a user?
As an administrator in TowSoft, you will have the “Client Zone” section in the left menu of the desktop version of the software.
Click on this heading and, in the options that pop open below, you will find “Clients”.
Clicking on this option will take you to the table of your Clients (or Clients list), a section of TowSoft that you are probably already much familiar with.

Table of clients
In the column to the right of the “Rate” column, you will see two options: a yellow button with an “x” , then another blue button with a user icon.
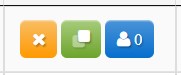
Actions column – Table of clients
If the number to the right of the user icon is 0, this means that no user of the order portal has been configured for this client. Otherwise, this number indicates the number of users of the order portal for that client.
By clicking on this blue button, you will have access to the table of users of the order portal which is split into two; the active users at the top and those who were disabled at the bottom.
To go to the login screen of your portal, you will find at the top of the table of users, a URL link that you can share to your customers so that they can then enter their username and password.
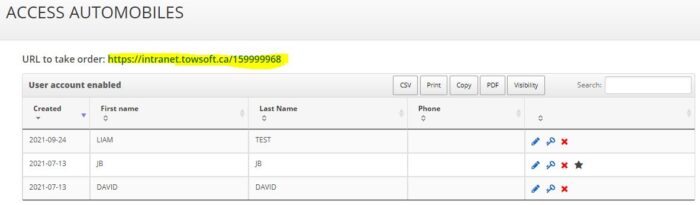
Web address (URL) for client access to the order portal (Intranet)
To give access to a new user, you must first create it by clicking on the “Add user” button at the top right of the table. This will open the new user creation window for the portal.

Add a new user to the order portal of the client
Then fill in the following fields:
First name -> Enter the user’s first name
Name -> Enter the user’s last name.r
Phone (optional) -> Enter the user’s phone number
Email -> Enter the user’s email address. * Please note that his/her order portal login information could be sent to this email address if you choose so later in the process, so make sure it’s the correct one.
Add password -> Enter a password for the user.
Confirm password -> Confirm the password for validation. * Please note that the password can be changed by the user later.
Access level -> Choose the level according to the following roles:
-
- Standard: Place orders, view ongoing and completed orders
- Police: All the features of Standard access, without making any fields mandatory at the form level in order to simplify the task of filling it out.
- Police 2: All the features of Standard access + the ability to view ongoing calls on a map and cancel orders
- Premium: All the features of Standard access + ability to see images added by the client, images added by the driver and the invoice.
Visible impounds -> Choose the impounds to which the user can have access in order to view the impounded vehicles. This functionality is mainly used for clients of the “government authority” category, such as the police, for example.
Do not send email -> Check this box if you want no email communication to be sent to the user’s email address. If it is not checked, the user will receive 1- A first email with his connection information and 2- Emails confirming the acceptance of the orders he has placed, each time you accept them in your TowSoft.
When you have completed the fields, click “Save” and the user will then be part of the “active” users for the client in question. He will therefore be able to access your portal:

Main view of the order portail (Intranet)
How do I create new order form templates?
Click on the “client zone” section and, in the options below, you will find “Order Templates”.
By clicking on this option, you will be taken to the table of Order templates, for which there is the “Model” tab for those that are active and “Deactivated” for those that are deactivated. This table will generally include 4 generic order templates; Police, Police 2, Premium, Standard. These templates of Order taking forms may not be suitable, so if needed you can create one for yourself.
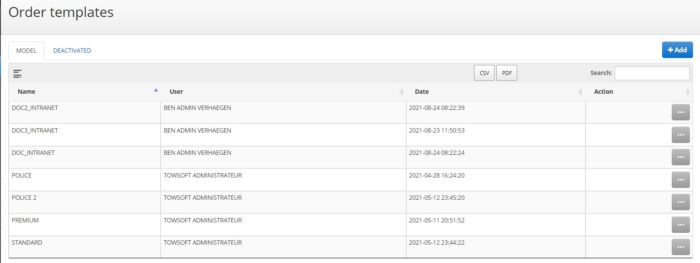
Table of the order form templates
To do this, you must click on the “+Add” button which appears at the top right of the table. A window for creating a new form should appear.
![]()
Add a new order form template
Here are the details on the fields to fill in to create a template form for taking orders.
Name of model -> Enter a name for the model so that you can recognize it among others later. Our clients sometimes choose to name it after a client.
Origin / Destination, Client, Vehicle and Additional info Sections
You can detail the components of each of these sections by clicking on the “+” to their right.
![]()
Click the “+” icon at the right to expand the section
You will see the list of fields contained in each of them and can choose to display a field, to make it mandatory and how to display it in the form according to the client’s language.
Here is an example of the first field that you will find in the “Origin / destination” section.
Show -> Check the box if you want the “Origin” field to appear in the form.
Required -> If you have chosen to display the field in the previous box, you can also make the entry of an “Origin” mandatory by the client. This will prevent him/her from submitting the order if the field is left empty.
English label -> Write the way you want this field to be displayed in the order form if you don’t like what is already suggested by default. Ex: If you prefer that the term “Pick-up location” be displayed to the client instead of “ORIGIN”, please enter it in the English label field.
French Label (will be visible only if you have French clients) -> Same as above, except that it will be for the Order portal users at clients whose language is configured as French.
When you have reviewed the sections and fields you want to add to your template, click Add at the bottom of the window and your new form will now be shown in the active templates.
Templates and orders visibility
In the same place as mentioned before, in the Order portal users table, under the “Add user” button, you will see the “Intranet options” button.

Button to add a new order form template to be used by the client and select the visibility
Clicking this button will open the window for selecting available templates for the client. In the “Authorized templates” field, you can add any template from the “active” list.
It is also possible to change the visibility of orders and quotes for the client. If the “All Client Orders” option is selected, this means the client can see the calls created in TowSoft assigned to their client account. This is necessary for using quotes. Quotes added in your TowSoft will be visible to the client, and they will be able to confirm the quotes on the order portal.
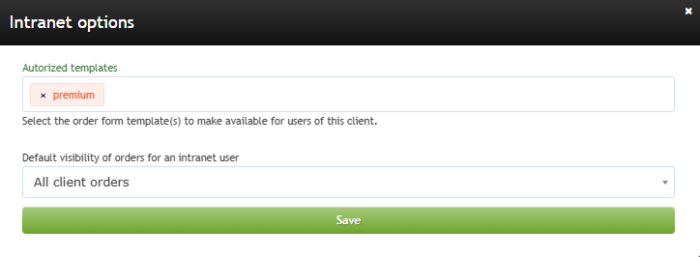
Select order form templates to be used by the client and change the visibility
From there, the client will be able to select, among these forms, the one he wishes to use from the portal.
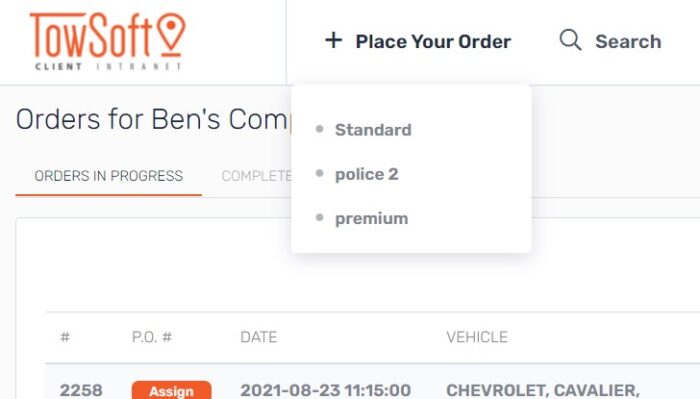
How the selected templates will appear for users of the order portal (Intranet)
That’s it, now you know how to give access to the order portal to your clients and how to configure custom order form templates.
List of comments