

In this lesson, we walk through the process of creating a new client in TowSoft (or modifying one).
Objectives of the lesson :
- Know how to request a batch import of clients
- Understand the different fields to fill in to create a new client
- Understand the advanced configuration options for a client
IMPORT A BATCH OF CLIENTS OR CREATE A SINGLE ONE?
First, you should know that the option to import multiple clients simultaneously (batch import) is possible in TowSoft. However, if you wish to do this, you must write to our support team since we will coordinate this maneuver with you.
If you want to create just one or a few clients, well, read on, as it’s explained in detail below.
CREATING (OR MODIFYING) A CLIENT
To create a new client, you must first go to Clients Zone > Clients in the left menu of your TowSoft, then click on the “Add client” button on the right. This is the window that will open.

Access to the “Clients” section

Add a new client button
To modify one, you just have to click on its name in the table of clients and the window will be practically the same.
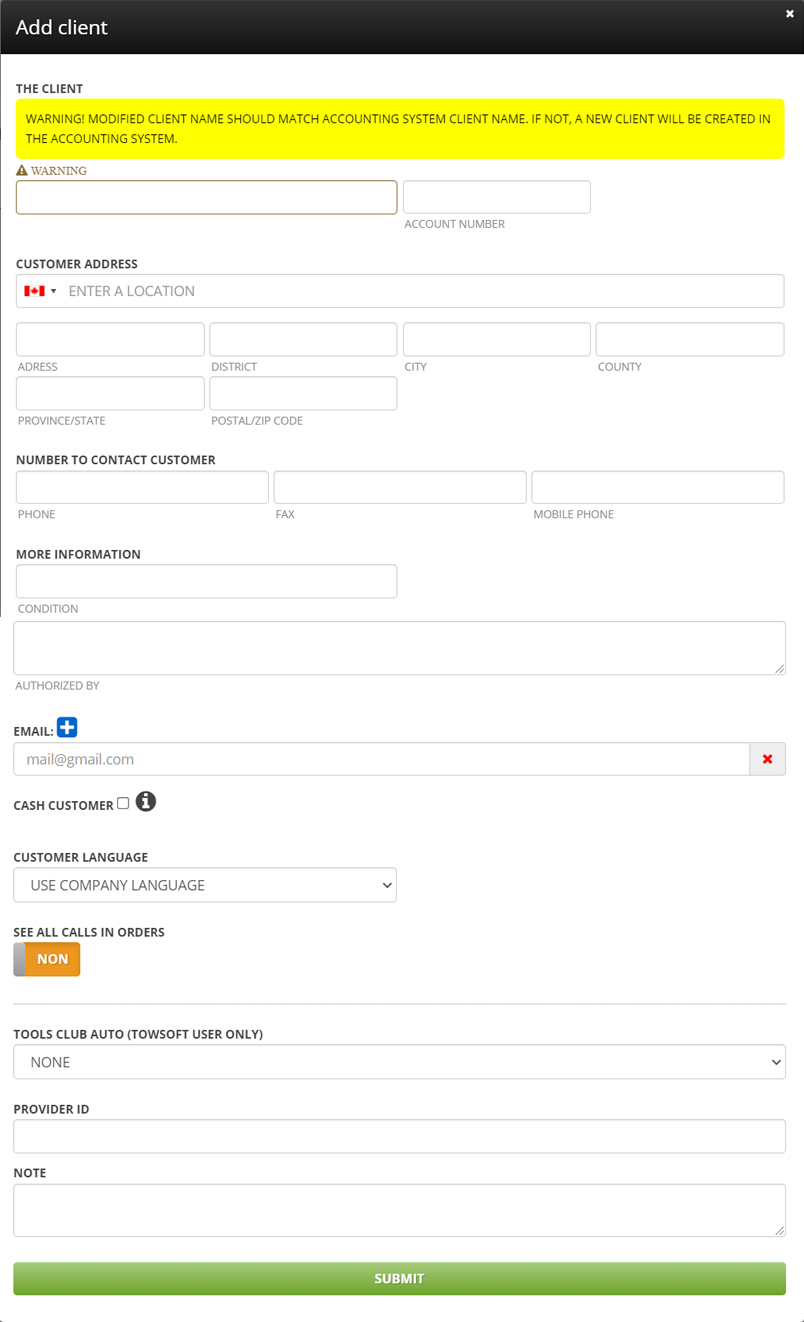
Basic client options window
The information to be entered in this window is as follows:
The client
Client name -> Enter the client name and be particularly careful if you are using SAGE as your accounting software, since TowSoft’s interface with this accounting system bases itself on this field to associate your clients.
Accounting ID (mandatory field) -> Enter the account number or identifier that is used for the client in your accounting system. If the client is not yet in your accounting system, assign them an identification number that you will continue to use for accounting purposes later.
Address and number
Client address -> Start filling in the client’s address, then among the options suggested in the drop-down menu, click on the one that corresponds to it. This will fill in the following fields (City, Department, Postal Code).
City, Province, Postal Code, Phone, Fax, Mobile Phone -> Enter the corresponding information, if any. This is pretty self-explanatory, you will agree.
More information
Condition -> Enter the payment conditions, if any. This will be displayed on the invoices you send to the client.
Email -> Enter the client’s email address. Use the blue “+” button to add more than one.
Authorized by -> Enter the name of the person responsible for the contractual relationship that you have with the client, if applicable.
Cash client -> Check if you want to create this client for customers/vehicle owners who pays in cash, directly on the roadside. Creating “Cash clients” allows to provide invoices to such customers with their info filled in, rather than the information from the client as is the case if this box is not checked.
Client language -> Choose the language in which to display your invoices sent to this client, as well as the web order portal that could be used by the client if you have created an access for him.
See all calls in orders -> To be activated (ie. Set to Yes) if you want all users of the web order portal for this client to be able to see a history of all orders that were placed, and not just those they have placed themselves.
Note -> Add any relevant note to display in the invoice that will be sent to the client.
ADVANCED CONFIGURATION OPTIONS
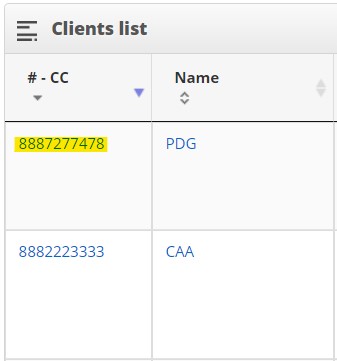
When the creation of the client is complete, TowSoft system administrators using versions greater than TowSoft Xlite will find a clickable ID in the “# -CC” column, consisting of a number assigned by the system in addition to the Accounting ID entered in the basic client options appears to the left of the client’s name.
Access to advanced configuration options
Clicking on this number will open the advanced configuration options window.

Advanced configuration options
The information to be entered in this window is as follows:
Priority -> If applicable, select from the Priority options configured in the “Companies and Options” section, the one that should be used by default each time a call is created for this client. This will cause the priority tag in question to appear in different areas in the system.
Zone -> If applicable, select from the Zone options configured in the “Companies and options” section, the one that should be used by default each time a call is created for this client.
Service -> If applicable, select from the service options configured in the “Service Codes” section, the one that should be used by default each time a call is created for this client.
Options
Tax free -> Check if no tax should be added to invoices made for this client.
Cash Only -> Check if this is a client for which only cash payments should be accepted.
Mandatory PO -> Check if you want a purchase order (PO) to be required each time a call is created for this client.
Motor Club -> Check if this is a roadside assistance company or motor club, which will allow a max. coverage to be added manually when creating a call for this client.
Bonus -> Bonus amount to be paid to the driver who will execute a call for this client.
List of comments